Ở phần trước, mình đã giới thiệu các bạn về Docker và tại sao chúng tại lại nên sử dụng Docker. Phần này chúng ta sẽ tìm hiểu về cách cài đặt và sử dụng Docker. Cụ thể trong bài viết này mình sẽ tạo 1 ứng dụng web đơn giản chỉ với trang index.html, môi trường để chạy ứng dụng web này làNginxvàPHP-FPM 7trên ubuntu.
1.Cài đặt Docker
Đầu tiên bạn cần phải cài đặt Docker trên máy của mình. Việc này khá đơn giản, chỉ cần vào link này và chọn Platform phù hợp. Hiện tại Docker hỗ trợ trên nhiều Platform như Desktop(Mac, Windows), Cloud(GCP, AWS, Azure, IBM), Server(ubuntu, CentOS, Oracle, Red Hat….).
Đối với Windows, phiên bản mới nhất của Docker thì hoạt động tốt trên Windows 10, nếu máy Windows của bạn không cài đặt được phiên bản Docker mới nhất, bạn có thể cài Docker Toolbox.
Sau khi tải file cài đặt của Docker, bạn cứ tiến hành cài đặt bình thường. Phần này thì khá dễ với dev nên mình không đề cập.
Sau khi cài đặt xong, bạn cần tạo tài khoản Cloud Docker để có thể quản lý và chia sẽ các Image của mình.

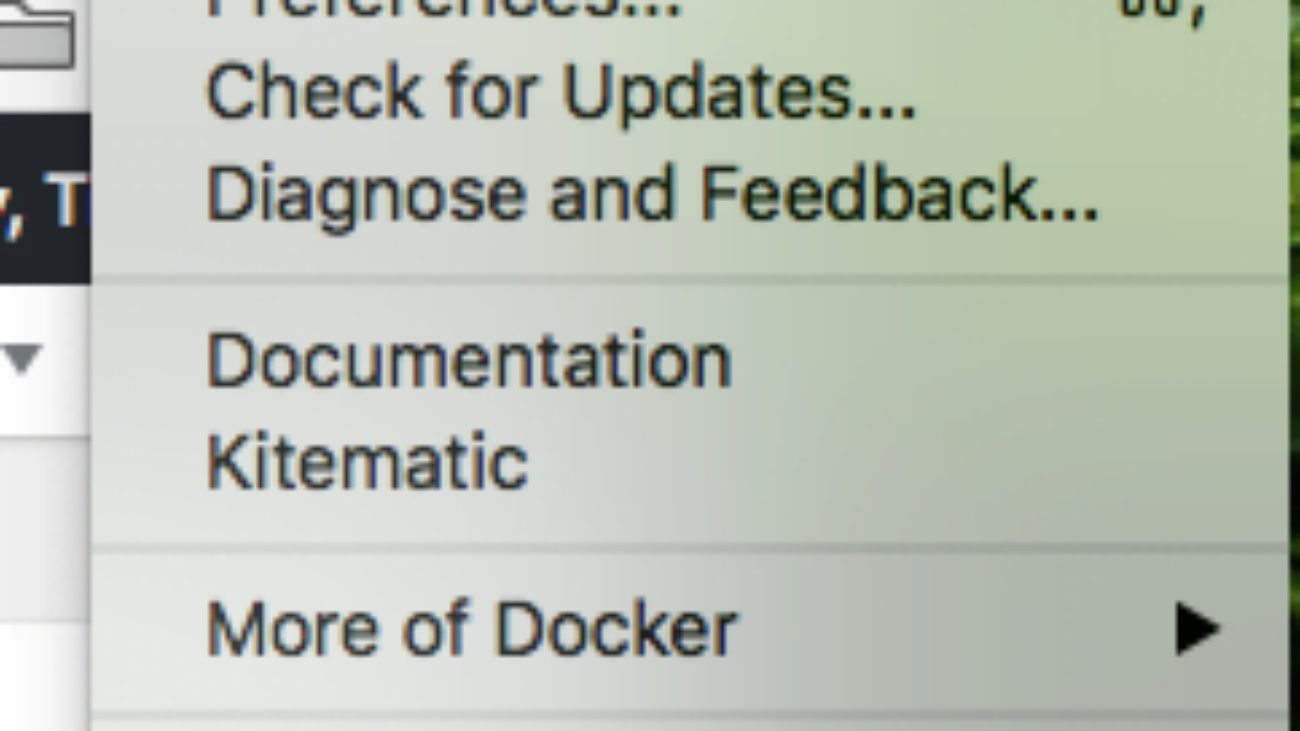
sau khi cài đặt Docker bạn sẽ nhìn thấy biểu tượng con cá voi của Docker, click vào Sign in/Create Docker ID để đăng nhập tài khoản bạn vừa tạo lúc nãy.

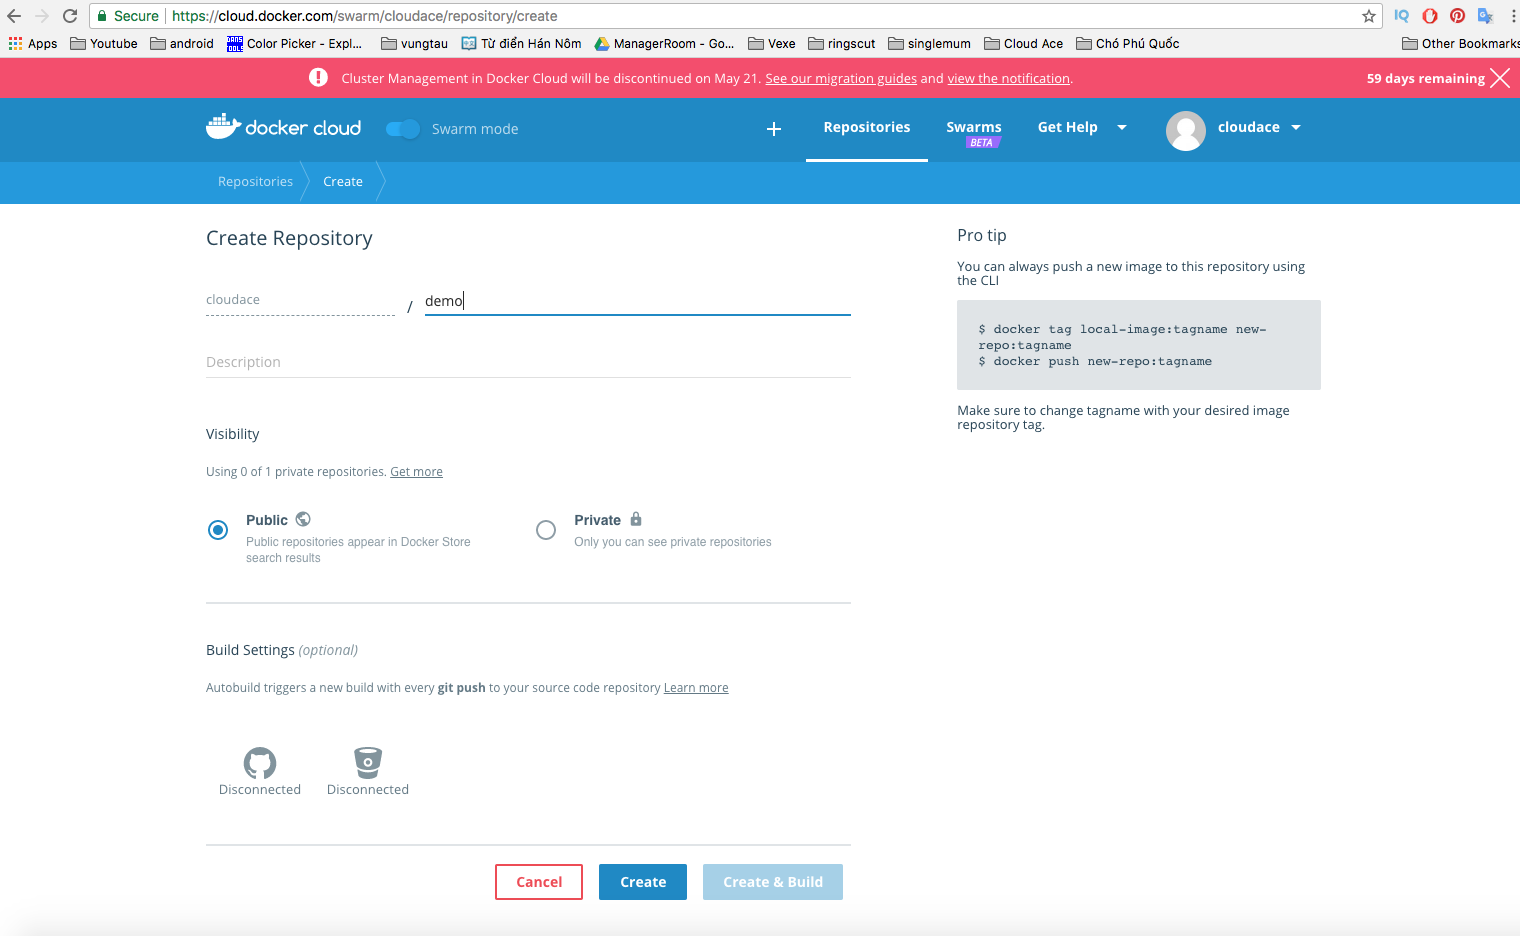
Tiếp theo cúng ta cần tạo 1 repositories, tính năng của nó cũng tương tự như Git Hub hoặc là Bitbucket.

Repositories mình tạo tên là demo. Vậy là xong phần cài đặt Docker
2. Tạo Docker Image
Các bạn cũng biết Docker Image là môi trường code mà mình dóng gói được. Vì vậy để dễ thao tác thì mình sẽ tạo 1 thư mục, chứa tất cả những gì mình muốn đóng gói lại.
Các bạn mở terminal và gõ các lệnh sau:
mkdir cloudace
cd cloudace
touch Dockerfile
Dòng đầu tiên là tạo thư mục tên cloudace , tiếp theo di chuyển đến thư mục cloudace và tạo file tên Dockerfile.

Các bạn mở file Dockerfile này lên, bằng gì cũng được, mình dùng TextEdit cho nhanh.
Sau đó thêm vào lần lượt các dòng sau:
#Download base image ubuntu 16.04
FROM ubuntu:16.04
Base Image chúng ta sử dụng là ubuntu
# Update Ubuntu Software repository
RUN apt-get update
lệnh này để update cái ubuntu đó.
# Install nginx, php-fpm and supervisord from ubuntu repository
RUN apt-get install -y nginx php7.0-fpm supervisor &&
rm -rf /var/lib/apt/lists/*
cài đặt Nginx, php-fpm, supervisord cho image
#Define the ENV variable ENV nginx_vhost /etc/nginx/sites-available/default
ENV php_conf /etc/php/7.0/fpm/php.ini
ENV nginx_conf /etc/nginx/nginx.conf
ENV supervisor_conf /etc/supervisor/supervisord.conf

# Enable php-fpm on nginx virtualhost configuration
COPY default ${nginx_vhost}
RUN sed -i -e 's/;cgi.fix_pathinfo=1/cgi.fix_pathinfo=0/g' ${php_conf} &&
 echo "ndaemon off;" >> ${nginx_conf}
config Nginx để nó có thể sử lý các ứng dụng PHP bằng cách chỉnh sửa config của default virtual host.
#Copy supervisor configuration
COPY supervisord.conf ${supervisor_conf}
config Supervisord cho Nginx và PHP-FPM. Chúng ta sẽ thay thế file config default của Supervisord bằng một file config mới sử dụng lệnh ‘COPYcủa Dockerfile
RUN mkdir -p /run/php &&
 chown -R www-data:www-data /var/www/html &&
 chown -R www-data:www-data /run/php
tạo một đường đẫn mới để lưu php-fpm sock file và cấp quyền owner cho /var/www/html và PHP thành www-data
# Volume configuration
VOLUME ["/etc/nginx/sites-enabled", "/etc/nginx/certs", "/etc/nginx/conf.d", "/var/log/nginx", "/var/www/html"]
định nghĩa volumn để chúng ta có thể mount list directory vào host machine
# Configure Services and Port
COPY start.sh /start.sh
CMD ["./start.sh"]

EXPOSE 80 443
định nghĩa default command cho container và mở port cho http và https. Chúng ta sẽ tạo một file start.sh cho default CMD command khi mà container được khởi chạy.
Dockerfile của chúng ta bây giờ giống như vầy:
#Download base image ubuntu 16.04
FROM ubuntu:16.04

# Update Software repository
RUN apt-get update

# Install nginx, php-fpm and supervisord from ubuntu repository
RUN apt-get install -y nginx php7.0-fpm supervisor &&
 rm -rf /var/lib/apt/lists/*

#Define the ENV variable
ENV nginx_vhost /etc/nginx/sites-available/default
ENV php_conf /etc/php/7.0/fpm/php.ini
ENV nginx_conf /etc/nginx/nginx.conf
ENV supervisor_conf /etc/supervisor/supervisord.conf

# Enable php-fpm on nginx virtualhost configuration
COPY default ${nginx_vhost}
RUN sed -i -e 's/;cgi.fix_pathinfo=1/cgi.fix_pathinfo=0/g' ${php_conf} &&
 echo "ndaemon off;" >> ${nginx_conf}

#Copy supervisor configuration
COPY supervisord.conf ${supervisor_conf}

RUN mkdir -p /run/php &&
 chown -R www-data:www-data /var/www/html &&
 chown -R www-data:www-data /run/php

# Volume configuration
VOLUME ["/etc/nginx/sites-enabled", "/etc/nginx/certs", "/etc/nginx/conf.d", "/var/log/nginx", "/var/www/html"]

# Configure Services and Port
 COPY start.sh /start.sh
 CMD ["./start.sh"]

EXPOSE 80 443
Tiếp theo, tạo các file default, supervisord.conf, start.sh cùng directory với Dockerfile
touch default
touch supervisord.conf
touch start.sh
Trong file default bạn thêm vào:
server {
 listen 80 default_server;
 listen [::]:80 default_server;

 root /var/www/html;
 index index.html index.htm index.nginx-debian.html;

 server_name localhost;

 error_log /var/log/nginx/error.log;
 access_log /var/log/nginx/access.log;

 location / {
  try_files $uri $uri/ =404;
 }

 location ~ .php$ {
  include snippets/fastcgi-php.conf;
  fastcgi_pass unix:/run/php/php7.0-fpm.sock;
 }

# deny access to .htaccess files, if Apache's document root
# concurs with nginx's one
# #location ~ /.ht { # deny all; #}
}
file supervisord.conf, thêm nội dung sau:
với file này bạn không thể mở bằng TextEdit, bạn hãy thử với các phần mềm khác. Mình thì dùng CotEditor.
[unix_http_server]
file=/dev/shm/supervisor.sock ; (the path to the socket file)

[supervisord]
logfile=/var/log/supervisord.log ; (main log file;default $CWD/supervisord.log)
logfile_maxbytes=50MB ; (max main logfile bytes b4 rotation;default 50MB)
logfile_backups=10 ; (num of main logfile rotation backups;default 10)
loglevel=info ; (log level;default info; others: debug,warn,trace)
pidfile=/tmp/supervisord.pid ; (supervisord pidfile;default supervisord.pid)
nodaemon=false ; (start in foreground if true;default false)
minfds=1024 ; (min. avail startup file descriptors;default 1024)
minprocs=200 ; (min. avail process descriptors;default 200)
user=root ;

; the below section must remain in the config file for RPC
; (supervisorctl/web interface) to work, additional interfaces may be
; added by defining them in separate rpcinterface: sections
[rpcinterface:supervisor]
supervisor.rpcinterface_factory = supervisor.rpcinterface:make_main_rpcinterface

[supervisorctl]
serverurl=unix:///dev/shm/supervisor.sock

; use a unix:// URL for a unix socket
; The [include] section can just contain the "files" setting. This
; setting can list multiple files (separated by whitespace or
; newlines). It can also contain wildcards. The filenames are
; interpreted as relative to this file. Included files *cannot*
; include files themselves.

[include]
files = /etc/supervisor/conf.d/*.conf

[program:php-fpm7.0]
command=/usr/sbin/php-fpm7.0 -F
numprocs=1
autostart=true
autorestart=true

[program:nginx]
command=/usr/sbin/nginx
numprocs=1
autostart=true
autorestart=true
file start.sh
#!/bin/sh
/usr/bin/supervisord -n -c /etc/supervisor/supervisord.conf
Quay lại Dockerfile và thêm dòng này vào cuối file:
RUN chmod +x start.shGiờ tiến hành tạo Image, bạn quay lại terminal lúc nãy và gõ câu lệnh sau:
docker build -t nginx_image .Nhớ là có dấu chấm phía sau nha bạn. Ở đây mình tạo Image tên là nginx_image
Sau khi tạo Image thành công, thì bạn sẽ nhận được thông báo như hình

để xem Image mà các bạn vừa tạo, gõ lệnh sau vào terminal:
docker images
Image mình vừa tạo 8 phút trước tên là nginx_image. Còn ubuntu là do mình làm cái này từ 2 tuần trước rồi, giờ làm lại thôi nên có sẳn, nó ko tạo lại.
3. Tạo Container và run web
Tiếp theo chúng ta chỉ cần tạo Container là có thể chạy được ứng dụng web. Nhưng trước tiên mình sẽ tạo thư mục website chứa website.
Đơn giản thôi, chỉ 1 trang index.html và bên trong đó là 1 thẻ tag h1 thôi.
Để tạo thư mục tên website các bạn thực hiện lệnh sau cho nhanh.
sudo mkdir -p /websiteBạn nhập mật khẩu của user hiện tại nếu có yêu cầu. Vậy là xong.

thư mục “website” nằm ngoài Users, còn thư mục “cloudace” chứa Dockerfile và file config thì nằm trong Users. Mình chụp hình lại để các bạn dễ hình dung thôi, bây giờ mình đã đóng gói thành Image, nên không quan tâm tới thư mục “cloudace” nữa.
Tiếp thẹo bạn tạo 1 file index.html với nội dung như sau:
<h1>Nginx and PHP-FPM 7 inside Docker Container</h1>sau đó cho file index.html vào thư mục website.
Cần tùy chỉnh 1 chút với folder website này. Bạn nhấp chuột vào biểu tưởng con cá voi của Docker, chọn Preferences -> File Share ->” +” và trỏ tới thư mục website, sau đó nhấn Apply & Restart như hình dưới.

đợi 1 xíu để Docker khởi động lại và có trạng thái Docker is running như hình.

Tiếp theo chúng tạo Container từ nginx_image
docker run -d -v /website:/var/www/html -p 9000:80 --name nginx_container nginx_imageGiải thích 1 chút chỗ này cho các bạn dễ hiểu:
- –name nginx_container nginx_image: tạo mới container với tên là nginx_container dựa trên image “nginx_image”
- -p 9000:80 : ‘nginx_container’ container chạy trên cổng 9000 của host machine
- -v /website:/var/www/html: Thư mục /website ở trên host machine sẽ được rewrite vào thư mục /var/www/html ở trong container.

1 dãy sốgì đó hiện ra vậy là xong việc tạo container, giờ hiển thị container như sau:
docker ps
Cuối cùng truy cập vào địa chỉ http://localhost:9000/index.html bạn sẽ nhận được kết quả:

Mình thử dừng container “nginx_container” bằng lệnh
docker stop nginx_containerđợi khoản 30s để hoàn thành.
sau đó f5 trang lúc nãy thì :

để khởi động lại container chỉ cần:
docker start nginx_containerchỉ mất khoản 2s để container hoạt động trở lại. F5 trang index.html thì đã hoạt động được.
Phần sau mình sẽ hướng dẫn các bạn push docker image này lên docker hub, sau đó dùng máy windows pull image về , tạo container và chạy ứng dụng web.
Liên hệ ngay với chúng tôi, Cloud Ace để được tư vấn về G Suite, Google Cloud Platform (GCP).


What a material of un-ambiguity aand preserveness of valuale knowledge regarding unwxpected feelings.
Hey there! This is my 1st comment here so I just wanted to give a quick shout out and tell you I really enjoy readig your blog posts. Can you recommend any other blogs/websites/forums that go over thhe same topics? Many thanks!
I loved as much as you’ll receive carried out right here.
The sktch is attractive, your authored subject matter stylish.
nonetheless, you command get bought an edginess over that you wish be delivering the following. unwell unquestionably come more formerly again since exactly the same nearly vry often inside case you shiueld this increase.